Wednesday, August 27, 2014

Sweet and Simple Birthdays

Over the years I have hosted an exorbitant number of birthday parties for my 3 kids.
We've had big family parties, Chuck E Cheese parties, Halloween parties, Hollywood parties complete with a red carpet and formal dresses, huge park parties with rented pavilion space, Harry Potter parties with handmade stuffed owl invitations and a fortune teller, and countless swim parties with clever games and homemade volcano cakes.

Recently my son, who is my youngest child, turned 13.

By the time you get to the 13th birthday of your youngest child, you're pretty much partied out.
I am at a loss for creative ideas for party themes, snacks, cakes or favors.

But the funny thing is... he doesn't care about any of that stuff.
He cares about spending time with his friends, eating cake and opening some presents.

So this year we kept the party sweet and simple.
A giant pizza not cooked by me, store bought cupcakes, and a backyard pool full of friends.

Dollar Tree paper goods

DIY party favors tutorial here.

Store bought cupcakes

Ginormous pizza

Flotation scarf

Does it really get any better than that?


À la vie et à l'amour
-Cortney


Monday, August 25, 2014

Dorm Sweet Dorm

So it's been a little over a week since my oldest daughter moved into her new college dorm room.
Move in day went very smoothly and we didn't even have to take any trips to stores for forgotten items.
I'd love to think it's because we planned everything out so well that nothing was forgotten.

We certainly brought plenty of stuff with us.

Plenty of stuff.

Sardine can.

After some goodbye hugs for everyone (and the dogs) we made the trek to her school which is a little over an hour from where we live.

Sister hug.
Bro hug.
Hugs for Gidget.
Ear scratches for Buster, crate for Winston.
Hugs for dad.
We barely had room for the plants, Fred (not pictured) and Ginger, the red-headed cactus.

We unloaded everything from the car and while I parked, my daughter, with the help of volunteers, managed to drag everything to her room.

Since her roommate had already moved in, we worked around where she had already placed some furniture and other items that needed to stay where they were, including a GIANT TV which my daughter couldn't have been happier about!

We started putting things away and moving things around...

Wee closet.
Desk supplies.
Very tall bed.
More desk supplies.
Hooking up the DVD player.

It was so fun to see all of our plans and DIY projects from the past few months finally come together in her new space.

Even though they didn't coordinate colors, bedding etc. beforehand, all of Jordyn's and her roommate's things worked really well together.

I like that they didn't go 'matchy' for their room.
Because isn't individuality what college is all about???


The DIY heart pillow based on another project I did looked really cute on the chair her roommate brought.


The DIY cork tile dorm shelf fit (and looked) great and added storage which is something you can never have too much of in a dorm room.


The DIY quilted bunting was something that I grabbed just before leaving in case she wanted to use it.
I like that it added a touch of vintage amidst all of the modern items.


We made most o the throw pillows except for the polka dot one from Ikea.

Lofted bed, giant TV.

Small basket from Ikea tied to the bed post to hold a book or an Iphone in lieu of a nightstand. 

Her red trunk that I wrote about here works great for extra seating or a place to toss stuff on top of or inside.
She added a lock in case she wants to lock up her laptop or the loads of extra cash college students always have.

Bless Ikea and their storage boxes and baskets.
Fred and Ginger in the window.
I wonder if this room still looks this clean a week later???


It took several hours and by then we were pretty much starving.
So we headed to a local burger place for fried pickles, tater tots, and milkshakes.


We're pretty much health food junkies!

And, of course I've already mailed her some items I thought she wouldn't be able to live without.
Hopefully she'll let me take more pictures during Family Weekend.

I'll use this door sign I made for her as my bartering tool...


And yes, I miss her already.

À la vie et à l'amour
-Cortney


Monday, August 18, 2014

DIY: Personalized Leather Key Tags & Bracelets

My favorite DIY projects are the ones that can be completed in about an hour or less.
I also love making things that are simple, fun and that can be shared as gifts.

When my son's 13th birthday party plans rolled around and I was, once again, without any clever ideas for party favors that didn't involve a bunch of junk from the Dollar Tree, I decided we would make each attendee a personalized leather gift.


I bought this kit from my local craft store about a year ago with a 40% off coupon and made myself and my son leather wristbands.


I wear mine literally ALL the time.


For the party favors I wanted to add a little bit more embellishment.

This kit (with 40% off again) came with keychains and I thought they would be perfect for the boys.


Even if they don't have keys I figured they could attach it to a backpack to make it more easily identifiable.
Or they can throw them at each other like arrowheads or darts because throwing stuff at each other seems to be something boys really like to do.

The kit only came with enough tags for the boys so, for the girls, I chose leather wristbands because I love my own so much.


Here's the super simple process that even monkeys 
(or your 18 year old and almost 13 year old) 
can do:

Step 1)
Dampen your leather with a wet washcloth.
I don't have a photo of this step because it's pretty self explanatory.

Step 2)
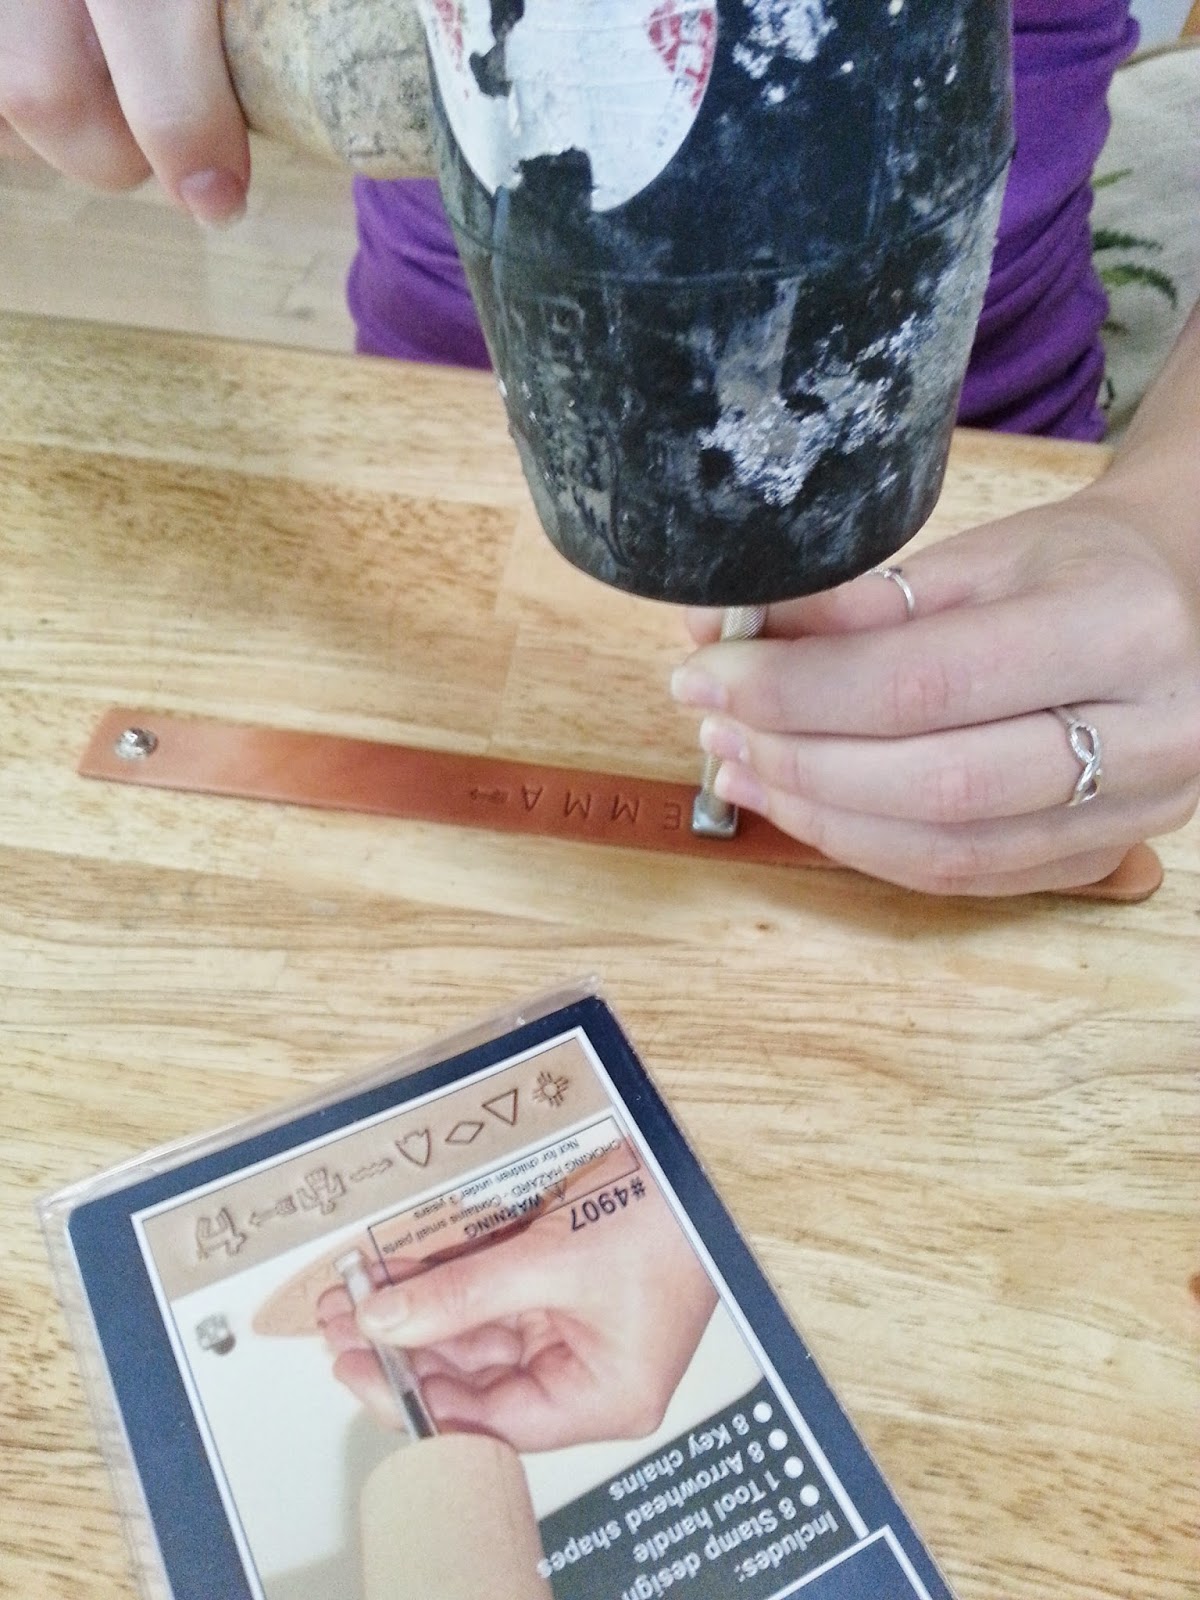
Using your leather tooling kit and a rubber mallet, stamp your design into the leather.
(I found that tapping the tooling wand 15 times for each stamp was ideal.)


Step 3)
Let leather dry.

Drying

Step 4)
Dye your leather the color of your choice or just use a leather conditioner to seal it.
You can purchase both at the craft store.


I use a special tool called, 'paper towel' to apply my leather dye.


Step 5)
Let the dye dry completely.


Dry and ready!

Step 6) OPTIONAL
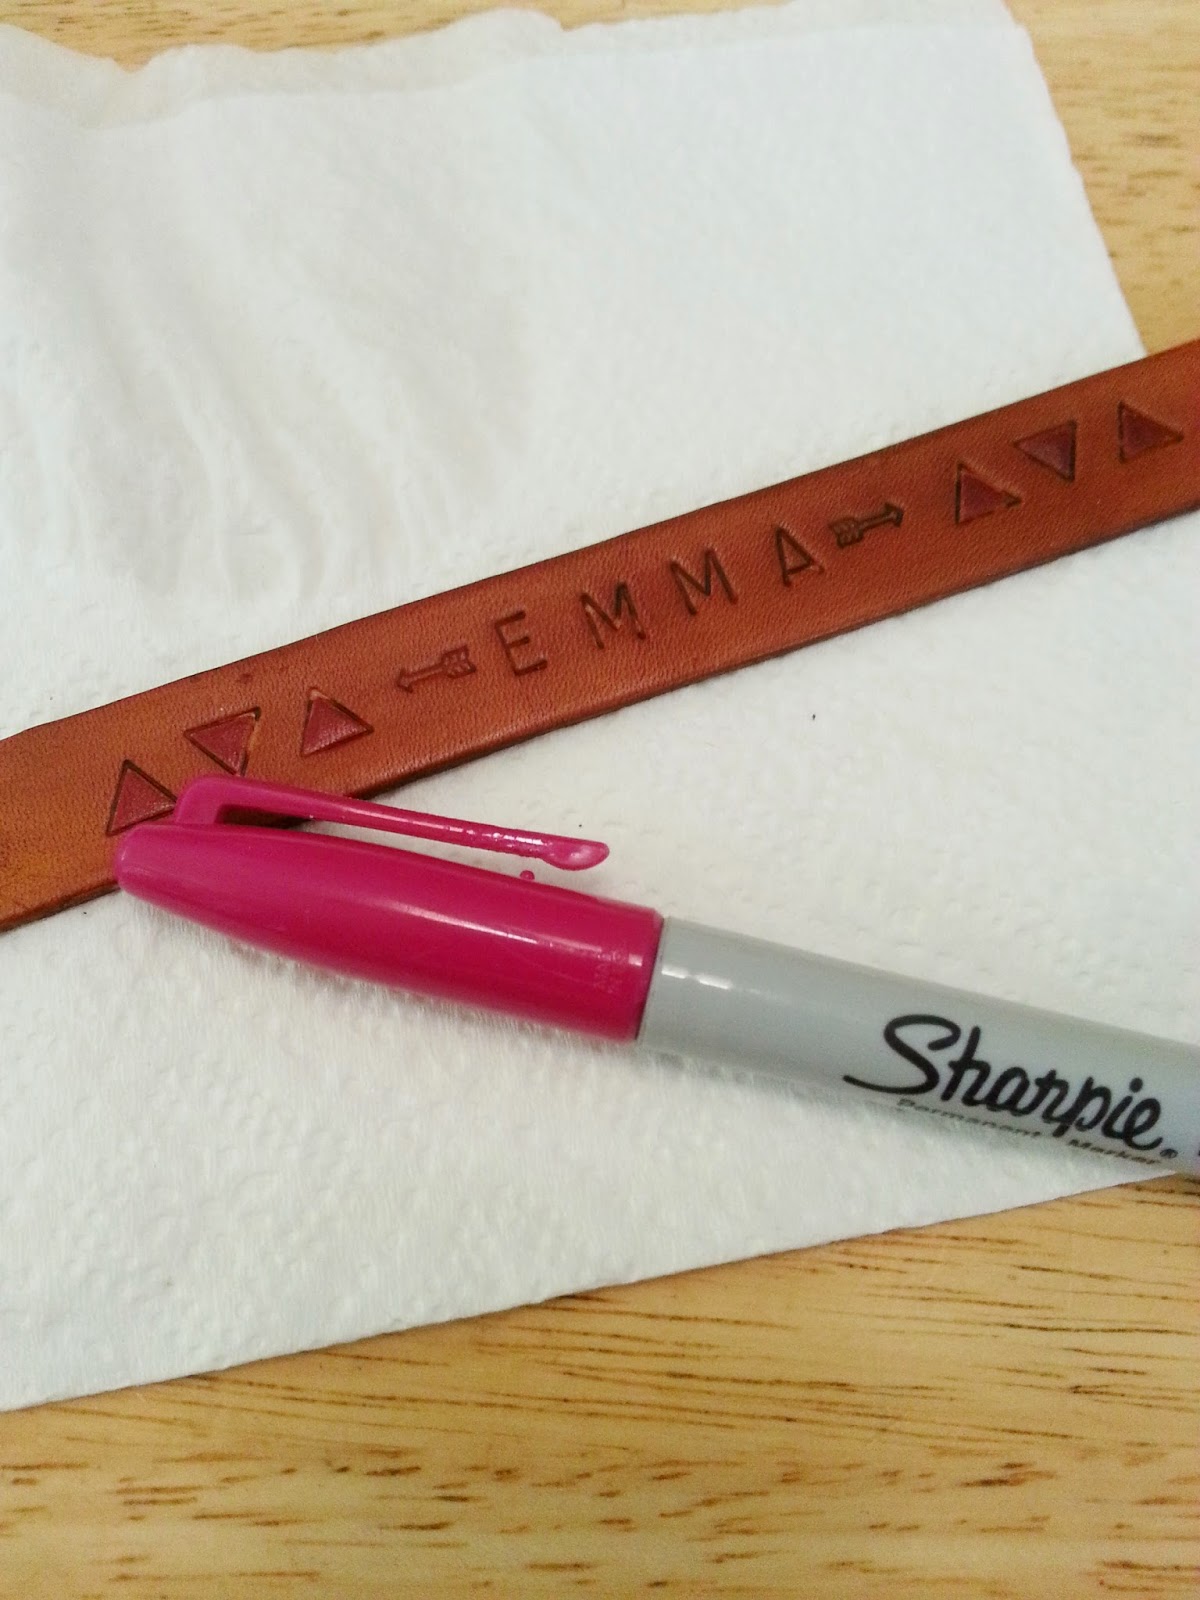
After ours were dry I decided to add a little color to our designs using Sharpie.
It worked great!


The kits can be pricey, especially if you don't use a 40% off coupon, but you can use them again and again to make other great tooled leather pieces.

Even with the cost of an additional kit I think I actually spent less than I normally would on Dollar Tree items that would end up thrown away after about 5 minutes.

And these are a lot more fun for your tribe to make!

À la vie et à l'amour
-Cortney


Monday, August 11, 2014

Space Saving Dorm Bookshelf

With less than a week before my daughter heads off to college, we have been gathering up our last few bits and pieces to make sure her new dorm room is organized, comfortable, and stylish.

She is quite lucky in that her dorm room is already updated and has nice floors, a large window and sturdy, modern, basic furnishings.
(You can see photos of it here.)

We noticed very early on, though, that one important item was missing - a bookshelf.
So we made plans to find or build one that could fit on top of her desk.

Wish I had noticed and bought that cute little dog.

I happened across this one for $30 while shopping at a local antiques shop.
To me it seemed like a great size, it was very sturdy and could be easily be painted if she didn't like the color.
But she was worried it was "too tall" so I sent another photo to give her a better idea of the size.


Obviously I could have been a supermodel...

or a toad.

Sadly, my daughter passed on this shelf, 
which would have been such an easy solution,
in lieu of building of our own.

Yay.

Our plan was to build something about 8 inches deep, 2 feet wide and without a base so she could slide her laptop underneath it and take up less space on her actual desk.  

We also decided that it would be useful if each of the shelf spaces was exactly the size of 2 square cork tiles so the back of the shelf could do double duty as her bulletin board since wall space is so limited in a dorm room.

We bought this package of 4 cork tiles from Target for $6.79.


These are not a high quality cork tile but since we are using them almost like a 'wallpaper' on the back of the shelves they should hold up.

No special DIY tutorials for this project because I basically just had to wing it and figured stuff out as I went along.
I did have to take a couple of mulligans and there are some flaws but overall the project came out as planned.

Big power tools.

It's level!

Primed and painted

Cork tiles inserted

She's thinking about adding some decorative hooks on the side so she hang necklaces, too.
Like this:
source

She may even want to add some washi tape to the shelf edges or other cute details.

source

The other cool part is that we built the shelf with future use in mind.
If she decides to use it later in an apartment, she can easily remove the cork tiles and leave the back painted or add some cute decorative wallpaper and use it as a desktop shelf again.

She can also add a base shelf and some casters to make a rolling bookshelf.
Or a coffee bar.

source

I'm so excited to see how her dorm room comes together next week!


À la vie et à l'amour
-Cortney